n8n.io on K3s & Cloudflare tunnel
n8n is a workflow automation platform that doesn't box you in, that you never outgrow, so why not to try it locally
I'll assume that you have read my previous article about Cloudflare tunnel and everything is up and running as needed. If not, go ahead and read it.
n8n is a fair-code licensed node-based workflow automation tool.
Fair-code is not a software license.
It describes a software model where software:
is generally free to use and can be distributed by anybody
has its source code openly available
can be extended by anybody in public and private communities
is commercially restricted by its authors
I am not going to go into more details, you are free to check n8n website to see what they offer and what you can do with it.
My setup is not the most secure one, so I assume that you will be running it locally on your RPI, as I am still learning the ups/downs of Kubernetes and there is a lot that I need to read/learn to cover all the security manners.
Requirements
n8n needs 3 main things to be configured and ready:
- Storage space.
- Service port.
- database
Before we start, make sure you create an empty database in your PostgreSQL instance, check our post for reference.
Storage Configuration:
There is a lot of options here, but you need to familiarize yourself with what K3s storage provides, remember K3s is a slimier version of K8s so not everything is available for you to use. Luckily for us, the local storage option is available.
So, what we will define is a local storage with read/write access permission and with 5GB of space, we can use the following to create it:
apiVersion: v1
kind: PersistentVolumeClaim
metadata:
  name: n8n-pvc
  namespace: n8n-server
spec:
  accessModes:
    - ReadWriteOnce
  storageClassName: local-path
  resources:
    requests:
      storage: 5Gi
Port Configuration
We are not going to change the default port, but we need to configure out cluster to allow the access to this port, so we have it like this:
apiVersion: v1
kind: Service
metadata:
  name: n8n
  namespace: n8n-server
spec:
  selector:
    app: n8n
  type: LoadBalancer
  ports:
    - name: n8n-port
      protocol: TCP
      port: 5678
Deployment
Now that we have the most basic information we need, we gather everything in one big yml file.
Lets call our yaml file n8n.yml and inside of it lets add the following:
---
apiVersion: v1
kind: Namespace
metadata:
  name: n8n-server

---
apiVersion: v1
kind: PersistentVolumeClaim
metadata:
  name: n8n-pvc
  namespace: n8n-server
spec:
  accessModes:
    - ReadWriteOnce
  storageClassName: local-path
  resources:
    requests:
      storage: 5Gi

---
apiVersion: v1
kind: Service
metadata:
  name: n8n
  namespace: n8n-server
spec:

  selector:
    app: n8n

  type: LoadBalancer

  ports:
    - name: n8n-port
      protocol: TCP
      port: 5678

---
apiVersion: apps/v1
kind: Deployment
metadata:
  name: n8n
  namespace: n8n-server
spec:

  replicas: 1

  selector:
    matchLabels:
      app: n8n
  template:
    metadata:
      labels:
        app: n8n
        name: n8n

    spec:

      nodeSelector:
        kubernetes.io/hostname: worker-2
      containers:

      - name: n8n
        image: n8nio/n8n:latest
        imagePullPolicy: Always
        ports:
          - name: n8n
            containerPort: 5678
        env:
          - name: NODE_ENV
            value: production
          - name: GENERIC_TIMEZONE
            value: Europe/Istanbul
          - name: WEBHOOK_TUNNEL_URL
            value: https://n8n.cluster.local:5678/
          - name: DB_TYPE
            value: postgresdb
          - name: DB_POSTGRESDB_USER
            value: postgres
          - name: DB_POSTGRESDB_PASSWORD
            value: secret
          - name: DB_POSTGRESDB_DATABASE
            value: "n8n"
          - name: DB_POSTGRESDB_HOST
            value: postgres.postgres-server
          - name: DB_POSTGRESDB_PORT
            value: "5432"
          - name: N8N_ENCRYPTION_KEY
            value: "n8n"
          - name: N8N_BASIC_AUTH_ACTIVE
            value: "true"
          - name: N8N_BASIC_AUTH_PASSWORD
            value: admin
          - name: N8N_BASIC_AUTH_USER
            value: admin
          - name: N8N_PROTOCOL
            value: https
          - name: N8N_HOST
            value: n8n.cluster.local
          - name: N8N_PORT
            value: "5678"
        resources:
          limits:
            cpu: "1.0"
            memory: "1024Mi"
          requests:
            cpu: "0.5"
            memory: "512Mi"
        volumeMounts:
          - name: n8n-storage
            mountPath: /root/.n8n
          - name: n8n-storage
            mountPath: /opt/workflows

      volumes:
        - name: n8n-storage
          persistentVolumeClaim:
            claimName: n8n-pvc
If you like to know more about each and every environment variable that you can use, you can read the documentation here, but in general the one that I use setup the instance internal URL, the database configuration (I use the local postgres that we setup), the basic auth (for local service you don't need, so feel free to keep or remove them).
Since we stored all the information in one big file, all we need to do is to run the following command (from within your RPI):
kubectl apply -f n8n.yml
To check that everything is running we can run the following command:
kubectl get svc -n n8n-server
if everything was okay, you will get something like the following:
NAME   TYPE           CLUSTER-IP     EXTERNAL-IP                                    PORT(S)          AGE
n8n    LoadBalancer   10.43.105.20   192.168.68.110,192.168.68.111,192.168.68.112   5678:30687/TCP   22d
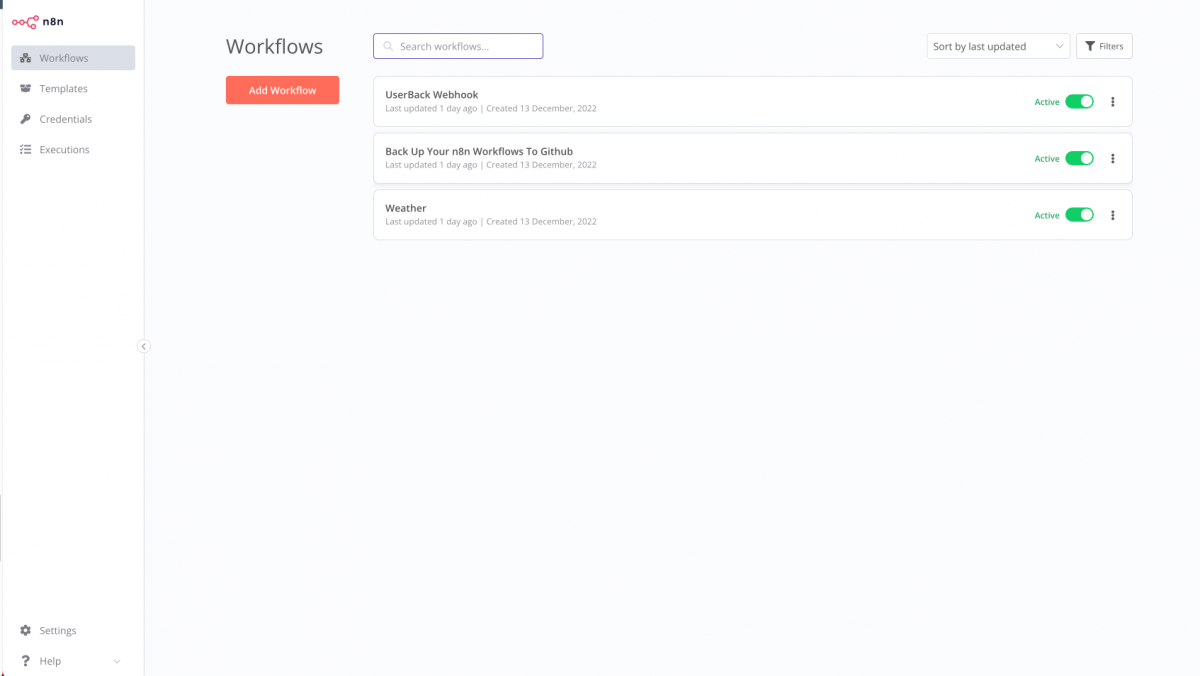
You can now access the service by heading to your browser and visit the following url : http://19.168.68.110:5678 and you will be see something similar to this one, but without those workflows (these are the one I created/imported after the setup)
For sure, my RPI ip address is different than yours so you will need to use your RPI ip address not mine.
Cloudflare Tunnel
Assuming that your tunnel is up and running, as I mentioned here, you have to click on configure

and then click on public hostname
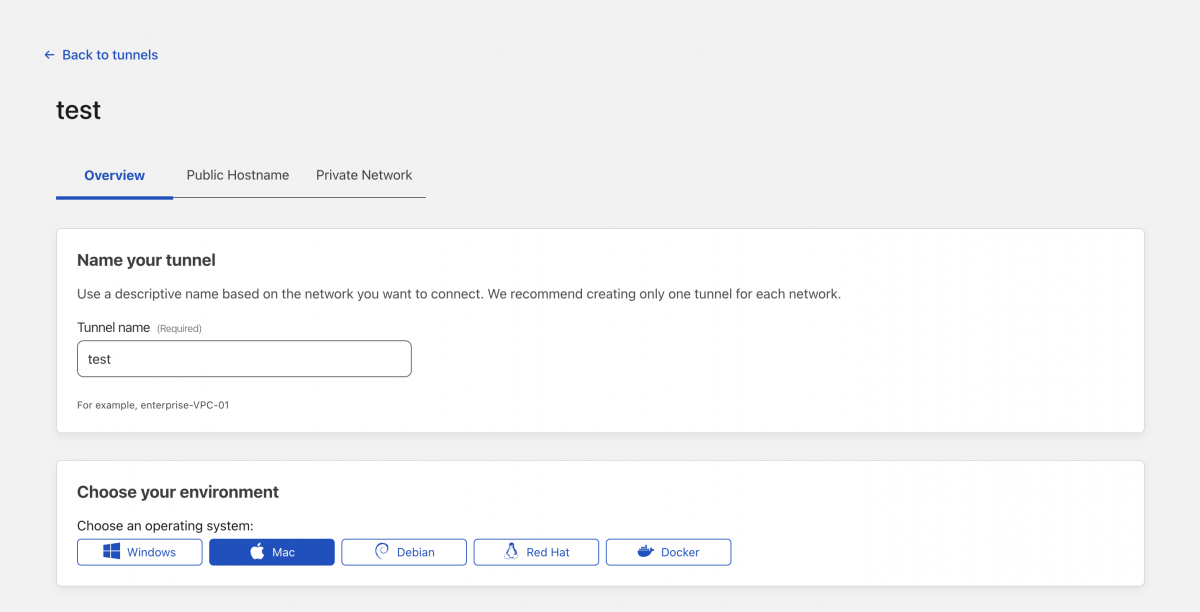
Then you will click on add a public hostname and add the following information, use your domain and the local IP address for your RPI
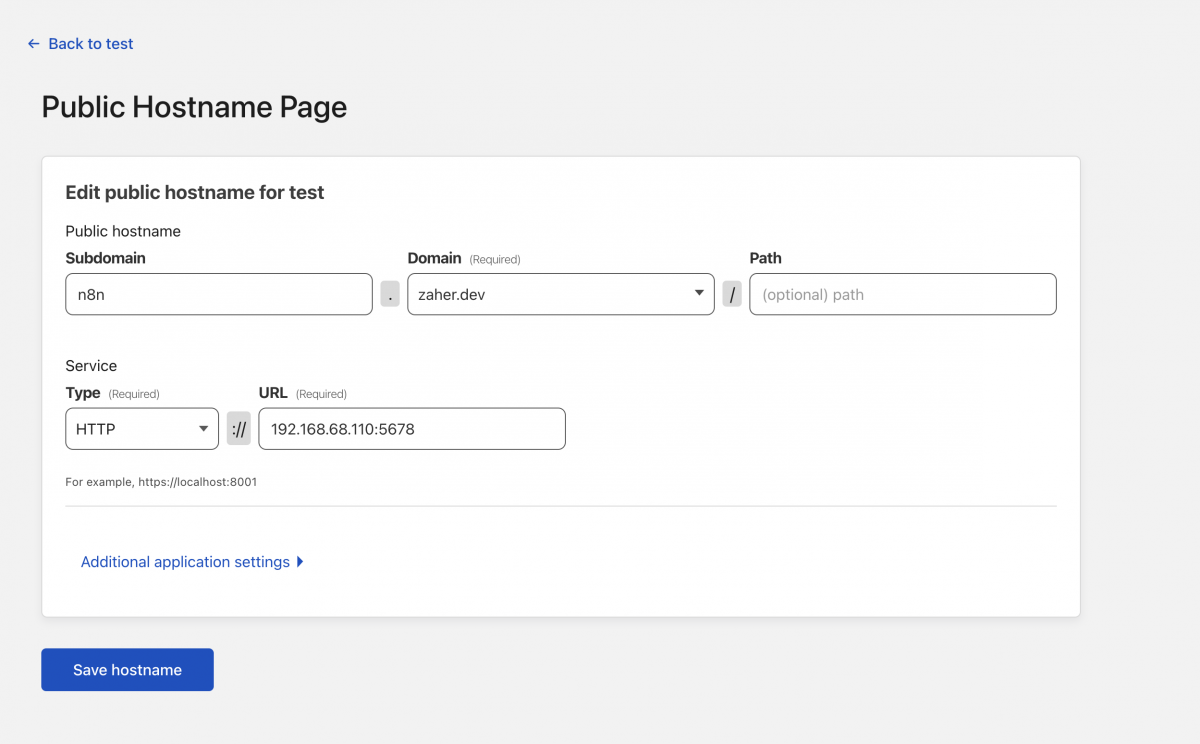
Once you save it, everything should like this
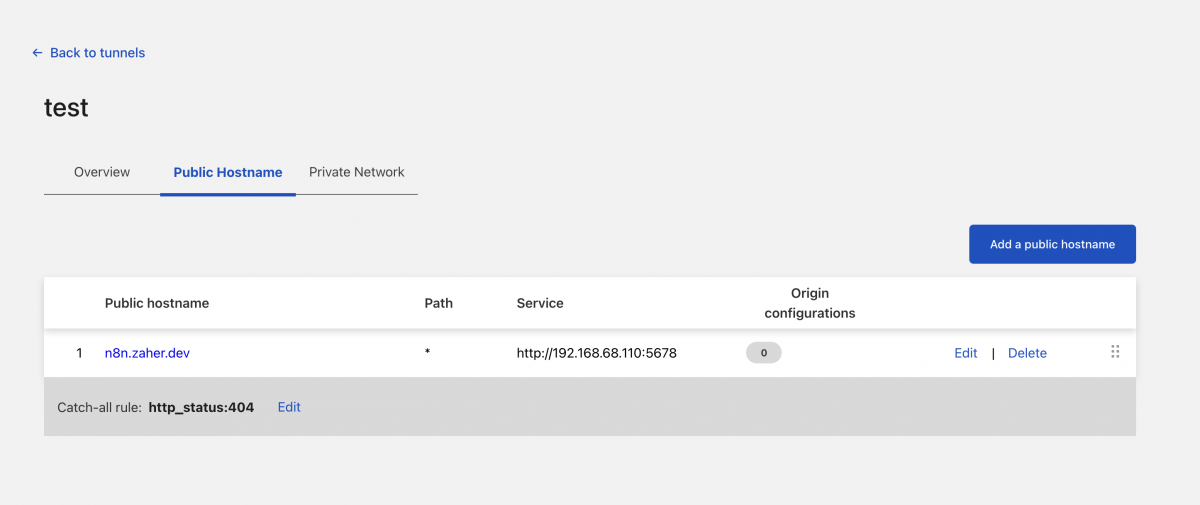
You can add as many public hosts as you want to your tunnel as long as they can connect to the local services.
You know that everything is working as it should, when you see the status healthy as the following from the tunnels list main page.

You can now use the url to access your instance, and since we configured the BASIC AUTH environment variable, your service is semi protected, but there is better way to protect it which is by using an identity provider, and Cloudflare provide you with many options to choose from
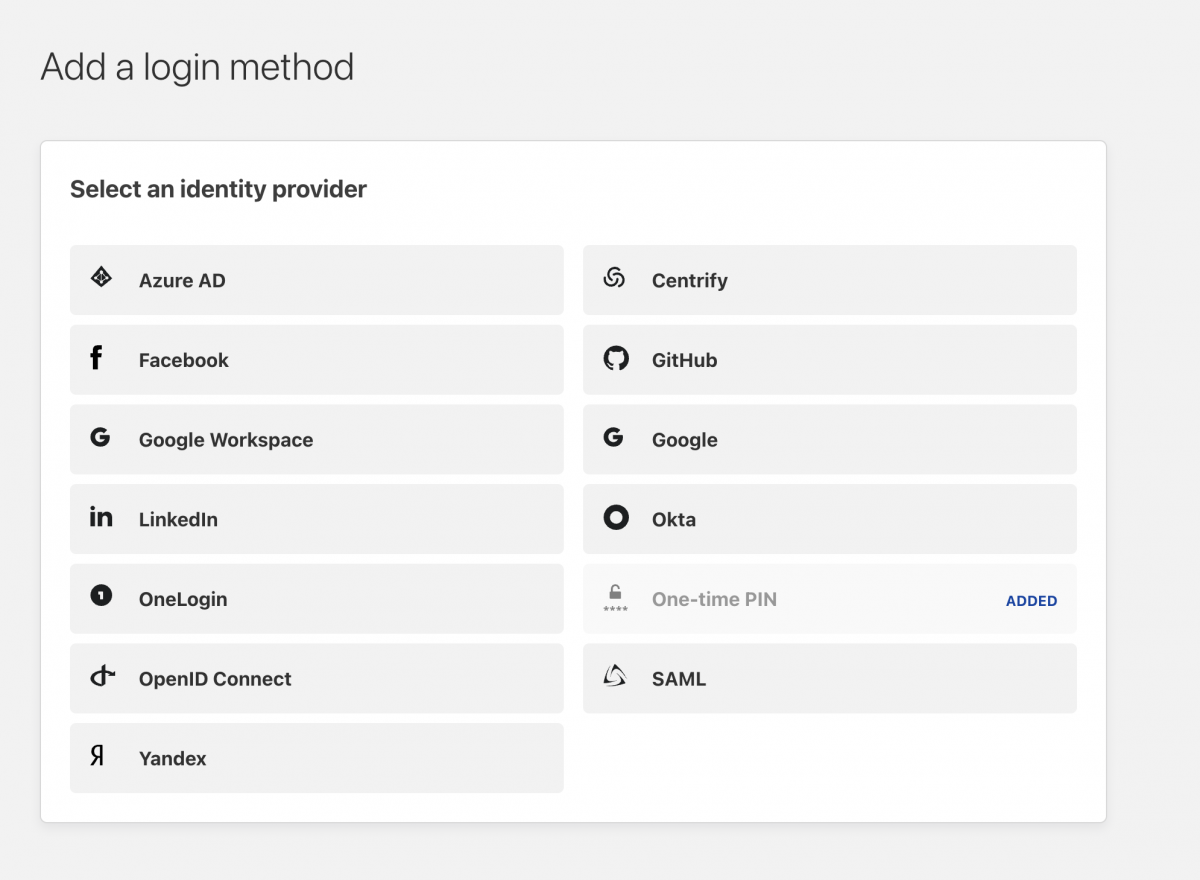
Talking about adding an identity provider is not within the scope of this article, but basically you will have to configure one then add an application with the same URL for that you use for your instance and choose that provider as your authentication method.