Host your own analytics with Umami, Supabase, Hetzner and K3s
We are going to explain how we can setup our own analytic server with the help of Umami, Supabase, Hetzner, and K3s.

It has been a long time since I wrote anything, so I'll share the last thing I have done recently. I needed to move my personal choise of analytic system from one server to another, but I didn't want to change much, and I want to have my data with me. Sadly Umami does not have an export data option, you will need to backup your database and use that backup instead.
So either I'll have to setup postgres and import my data, or use Supabase hosted database and import my data there, and as lazy as I am, I chose supabase (I am on the free plan so I only use two projects, one for my hosted n8n and now the second one will be for umami).
Umami and Supabase
Umami was build using nextjs and support MySQL and Postgres out of the box using Prisma, but Supabase needs a bit of change to the code to make it work.
Supabase, needs you to define two connections, one direct that you can use for migration (and seeds) and the second one for connection pooling, sadly, Umami decided not to include the direct url environment varabile, so we will need to update the code a bit.
Basically, we needs to open the scehma.prisma file and add the `directUrl` value to it. but instead of doing that manually, and since we will be depending on K3s (and docker image), I built a docker image that will do that automatically for us, so we ends up having everything ready for us without touching the code manually.
You can get see the code for the docker image at github here and you can pull the docker image like
docker pull ghcr.io/zaherg/umami-postgres:latest
There you will find two packages, one called nightly which will be built on a daily basis from the latest image from umami, and the other one called latest which will be built on a montly basis. as I am not going to follow up every release they do, and I like to live on the edge 🤷♂️.
Preparing K3s
Installing K3s is not that big of an issue, yes it is a samller version of Kubernetese but it has everything we need, so I am not going to waste your time explaining why I choose it, since its the only Kubernetese distribution I use/I know.
Setting up a Server
First of all, we need a server, and I think Hetzner is a decent choise, plus you can use the following code to get some credit using this referral link.
you can get a server with 4GB of ram for only ~€4/m which is more than enough, considering we will use Supabase for hosting our database.
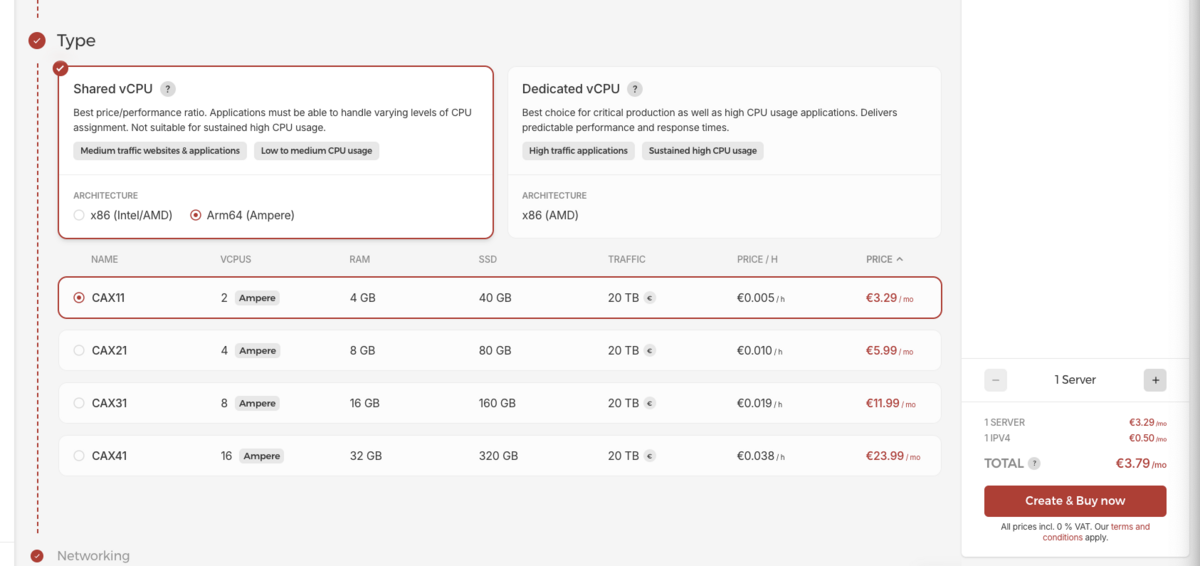
One of the things that I like to do when creating a new server is to use Cloud-Config to automate some of the things that I don't want, like creating a new user, disabling the root from ssh, use ssh key only for login to the system, so I'll share the one I use, and let you know what do you need to change
#cloud-config
users:
  - name: <YOUR-NAME>
    ssh-authorized-keys:
      - <YOUR-PUBLIC-SSH-KEY>
    sudo: ['ALL=(ALL) NOPASSWD:ALL']
    groups: sudo
    shell: /bin/bash
disable_root: true
packages:
  - fail2ban
  - ufw
  - supervisor
  - curl
  - wget
  - zip
  - unzip
  - git
  - zsh
  - htop
  - ca-certificates
  - software-properties-common
  - unattended-upgrades
  - debian-keyring
  - debian-archive-keyring
  - apt-transport-https
package_update: true
package_upgrade: true
runcmd:
  - ln -sf /usr/share/zoneinfo/UTC /etc/localtime
  - printf "[sshd]\nenabled = true\nbanaction = iptables-multiport" > /etc/fail2ban/jail.local
  - systemctl enable fail2ban
  - sed -i -e '/^\(#\|\)PermitRootLogin/s/^.*$/PermitRootLogin no/' /etc/ssh/sshd_config
  - sed -i -e '/^\(#\|\)PasswordAuthentication/s/^.*$/PasswordAuthentication no/' /etc/ssh/sshd_config
  - sed -i -e '/^\(#\|\)X11Forwarding/s/^.*$/X11Forwarding no/' /etc/ssh/sshd_config
  - sed -i -e '/^\(#\|\)MaxAuthTries/s/^.*$/MaxAuthTries 2/' /etc/ssh/sshd_config
  - sed -i -e '/^\(#\|\)AllowTcpForwarding/s/^.*$/AllowTcpForwarding no/' /etc/ssh/sshd_config
  - sed -i -e '/^\(#\|\)AllowAgentForwarding/s/^.*$/AllowAgentForwarding no/' /etc/ssh/sshd_config
  - sed -i -e '/^\(#\|\)AuthorizedKeysFile/s/^.*$/AuthorizedKeysFile .ssh\/authorized_keys/' /etc/ssh/sshd_config
  - sed -i -e '$aAllowUsers zaher' /etc/ssh/sshd_config
  - systemctl restart ssh.service
  - echo "vm.vfs_cache_pressure=50" | tee -a /etc/sysctl.conf
  - echo "LC_ALL=en_US.UTF-8" | sudo tee -a /etc/environment
  - echo "LANG=en_US.UTF-8" | sudo tee -a /etc/environment
Change anything like <your-name> and <your-public-key> to what you want so you can login to your server
Once you clicked create, you should wait for a few min til your server is ready, creating a new server won't take much, but the time to have everything up-todate.

Once everything is finished, you can login using your username and the ip address of the server
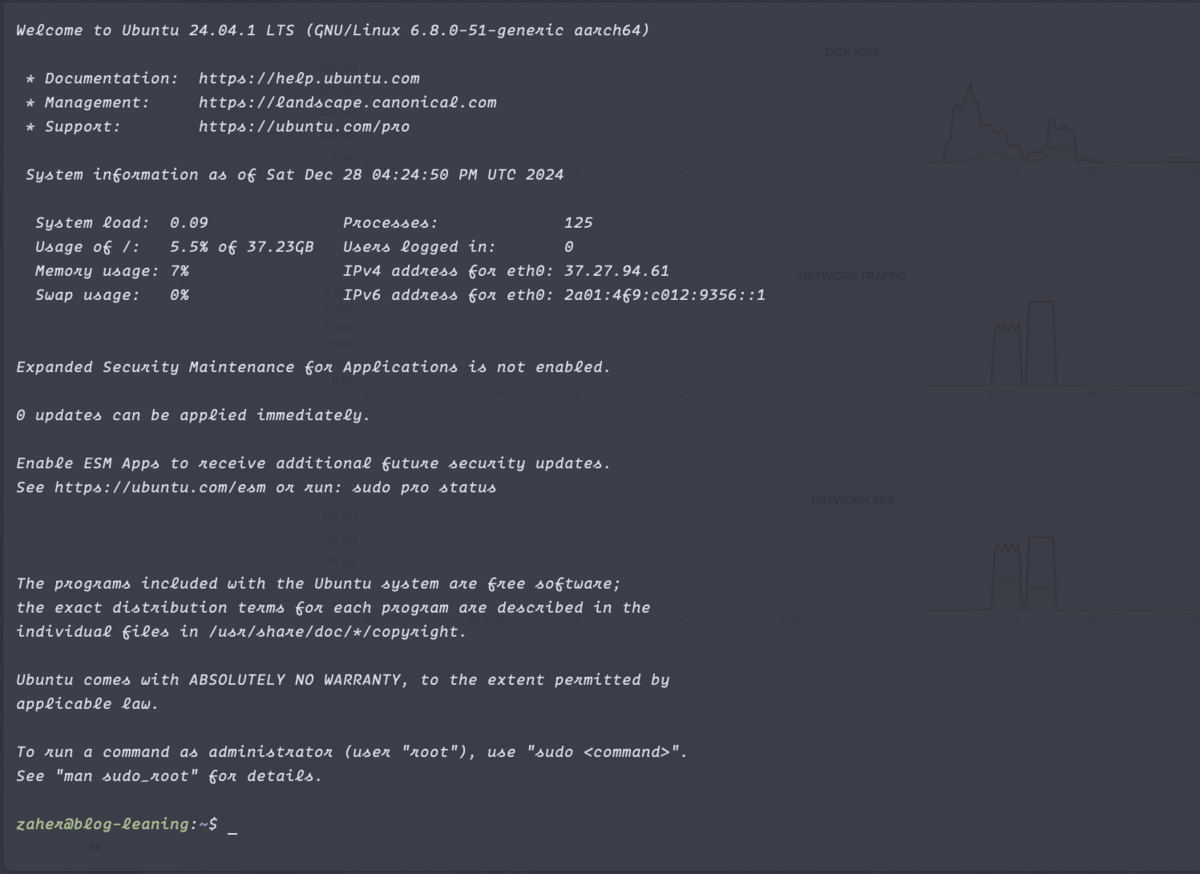
Since we have already run the updates using the cloud config, we have nothing to do here, we need to move to the next step, installing K3s.
Installing K3s
Now that the server is ready we can install K3s using the following command
curl -sfL https://get.k3s.io | INSTALL_K3S_CHANNEL=latest sudo sh -s - --write-kubeconfig-mode 644 --prefer-bundled-bin --disable traefik --bind-address 37.27.94.61
looking at the command, you will notice the following:
1. we are installing the latest version.
2. we are binding it to the server address
3. we are disabling traefik (we will install it later).
4. we are running the command as root.
Once its installed we can check the status using systemctl status k3s and we should get something similar to
zaher@blog-leaning:~$ systemctl status k3s.service
● k3s.service - Lightweight Kubernetes
     Loaded: loaded (/etc/systemd/system/k3s.service; enabled; preset: enabled)
     Active: active (running) since Sat 2024-12-28 16:36:06 UTC; 9s ago
       Docs: https://k3s.io
    Process: 2713 ExecStartPre=/bin/sh -xc ! /usr/bin/systemctl is-enabled --quiet nm-cloud-setup.service 2>/dev/null (code=exited, status=0/SUCCESS)
    Process: 2715 ExecStartPre=/sbin/modprobe br_netfilter (code=exited, status=0/SUCCESS)
    Process: 2718 ExecStartPre=/sbin/modprobe overlay (code=exited, status=0/SUCCESS)
   Main PID: 2722 (k3s-server)
      Tasks: 20
     Memory: 572.9M (peak: 574.9M)
        CPU: 18.437s
     CGroup: /system.slice/k3s.service
             ├─2722 "/usr/local/bin/k3s server"
             └─2764 "containerd "
Now that k3s is installed, we need to get the configuration so we can connect to it from our local computer, to do so, we need to make sure that we have kubectl installed and ready for use.
We need to copy the config from our server to our local machine, we can do that using the scp command like
scp zaher@37.27.94.61:/etc/rancher/k3s/k3s.yaml ~/.kube/config
Make sure to have the directory .kube there before copying the file. Once the file is there we can run the following command for validating that we can connect to our cluster
kubectl get nodes
and the result should be something like
NAME           STATUS   ROLES                  AGE   VERSION
blog-leaning   Ready    control-plane,master   34m   v1.31.4+k3s1
Securing the server
We don't need to keep the server open, but at the same time we don't want to close it completley as many ports are needed for K3s to stay open, as lazy as I am, I'll list the ports and the command needed to block them using ufw but you will need to be root when doing so.
# First disable all incoming
ufw default deny incoming
# Allow all outgoing
ufw default allow outgoing
# Allow SSH
ufw allow 22/tcp
# K3s supervisor and Kubernetes API server
ufw allow 6443/tcp
# ETCd
ufw allow 2379:2380/tcp
# Kubelet
ufw allow 10250/tcp
# Flannel VXLAN
ufw allow 8472/udp
# CoreDNS
ufw allow 53
# Metrics Server
ufw allow 10249/tcp
ufw allow 10259/tcp
# Enable UFW
ufw enable
Installing Helm v3
There are many way to do so, I'll use the lazyest one (if you are on linux)
curl https://raw.githubusercontent.com/helm/helm/main/scripts/get-helm-3 | bash
or using brew if you are on mac brew install helm
You can always refer to this installation guide and choose what fits your need.
We will use helm to install traefik v3 and other apps later.Installing Traefik Proxy
Installing Traefik Proxy
As I mentioned we didn't install the default traefik version so we can install the latest version using helm and keep it up-to-date with a different cycle than K3s.
Installing it consist of 3 commands:
1. Add helm repo
helm repo add traefik https://traefik.github.io/charts
2. Update helm repos
helm repo update
3. Install the app
helm upgrade --install traefik --create-namespace --namespace=traefik traefik/traefik
Once we are done, we can run the following command and get results similar to this
# Check the pods
➜ kubectl get pods -n traefik
NAME                       READY   STATUS    RESTARTS   AGE
traefik-854f7dbd4b-mjdwg   1/1     Running   0          3m46s

# Check the service
➜ kubectl get svc -n traefik
NAME      TYPE           CLUSTER-IP      EXTERNAL-IP   PORT(S)                      AGE
traefik   LoadBalancer   10.43.133.206   37.27.94.61   80:30153/TCP,443:31715/TCP   5m52s
For sure, the IP address you will see will be different than the one I have above, as you will see your server IP address not mine.
and if you tried to visit the IP you will be greeted with page not found like so

Installing Cert-Manager
There are many ways to obtain an SSL certificate for your domain, traefik can be used for that, but what we will do is a bit different, we will use an application (tbh not sure what to call those, but I'll go with application), that will take care of helping us issuing the SSL certificates we need when we need them.
Since we have installed helm, we will use it for installing cert-manager
1. we add the repo and force the update
helm repo add jetstack https://charts.jetstack.io --force-update
2. we install cert-manager
helm install \
  cert-manager jetstack/cert-manager \
  --namespace cert-manager \
  --create-namespace \
  --version v1.16.2 \
  --set crds.enabled=true \
  --set replicaCount=2 \
  --set podDisruptionBudget.enabled=true \
  --set podDisruptionBudget.minAvailable=1
and the result should be something like
NAME: cert-manager
LAST DEPLOYED: Sat Dec 28 20:38:58 2024
NAMESPACE: cert-manager
STATUS: deployed
REVISION: 1
TEST SUITE: None
NOTES:
cert-manager v1.16.2 has been deployed successfully!
In order to begin issuing certificates, you will need to set up a ClusterIssuer
or Issuer resource (for example, by creating a 'letsencrypt-staging' issuer).
More information on the different types of issuers and how to configure them
can be found in our documentation:
https://cert-manager.io/docs/configuration/
For information on how to configure cert-manager to automatically provision
Certificates for Ingress resources, take a look at the `ingress-shim`
documentation:
https://cert-manager.io/docs/usage/ingress/
To validate that everything went as plan, you can check the pods created for cert-manager like
➜ kubectl get pods -n cert-manager
NAME                                      READY   STATUS    RESTARTS   AGE
cert-manager-b6fd485d9-9rnqz              1/1     Running   0          3m
cert-manager-b6fd485d9-mrmrm              1/1     Running   0          3m
cert-manager-cainjector-dcc5966bc-rzlxx   1/1     Running   0          3m
cert-manager-webhook-dfb76c7bd-rkbcj      1/1     Running   0          3m
Now we are ready to move on to the real work 😅 .
Create the Umami Deployment
Creating the deployment consist of
1. Creating a namespace
2. Creating a service
3. Creating an ingressroute which communicate with traefik proxy to expose the service to the outside world.
4. Creating secrets which holds the infromations about our database connection strings
5. Finally, Creating a deployment
Most people will tells you that you can install everything under the default namespace and not complicate your life, but not me, I'll say complicate it as much as you can, and use AI services to help you fix any mess you create. This is a learning process, so don't stop with the default namespace.
I like the separation even it meant that it'll complicate my life, this is why I create a namespace for every project/deployment I do.
Creating a namespace is not that much of a fuzz, its a small command that you can do, or just have it in your yaml file like
---
apiVersion: v1
kind: Namespace
metadata:
  name: umami
Then we define our service, which (for my knowledage) is what expose our deployment internally, so we can target that service instead of looking for the local IP for the pod, which will change with every restart or update ... etc
---
apiVersion: v1
kind: Service
metadata:
  name: umami-service
  namespace: umami
spec:
  type: ClusterIP
  selector:
    app: umami
  ports:
    - port: 3000
Then we define the IngressRoute which is used by Traefik to expose our service externally using some defined rules
---
apiVersion: traefik.io/v1alpha1
kind: IngressRoute
metadata:
  name: umami-ingress
  namespace: umami
spec:
  entryPoints:
    - web
  routes:
  - match: Host(`um.learn.zah.me`)
    kind: Rule
    services:
    - name: umami-service
      port: 3000
As you can see, it tells Trafik to route any request to um.learn.zaher.dev to the umami-service that we have defined before.
The idea behind the secrets is that they are secrets, we don't want people to see them or read them or being easy to spot from the deployemtn
---
apiVersion: v1
kind: Secret
metadata:
  namespace: umami
  name: umami-secret
type: Opaque
stringData:
  APP_SECRET: Barnbrack53-notify62
  DATABASE_URL: postgresql://postgres.[your-username]:[yourpassword]@aws-0-eu-central-1.pooler.supabase.com:6543/postgres?pgbouncer=true
  DIRECT_URL: postgresql://postgres.[your-username]:[yourpassword]@aws-0-eu-central-1.pooler.supabase.com:5432/postgres
The DATABASE_URL and DIRECT_URL are something you can get from your Supabase project, mine are hosted in the EU, this is why it is AWS EU Central, yours can be anywhere. but as a rule of thumb, have your database in the same region as your server.
Now the deployment, its a long text, but can be understood easily (I guess)
apiVersion: apps/v1
kind: Deployment
metadata:
  name: umami
  namespace: umami
  labels:
    app: umami
spec:
  replicas: 1
  strategy:
    type: RollingUpdate
    rollingUpdate:
      maxSurge: 1
      maxUnavailable: 0
  selector:
    matchLabels:
      app: umami
  template:
    metadata:
      labels:
        app: umami
        name: umami
    spec:
      containers:
        - env:
            - name: DATABASE_TYPE
              value: postgresql
            - name: APP_SECRET
              valueFrom:
                secretKeyRef:
                  name: umami-secret
                  key: APP_SECRET
            - name: DATABASE_URL
              valueFrom:
                secretKeyRef:
                  name: umami-secret
                  key: DATABASE_URL
            - name: DIRECT_URL
              valueFrom:
                secretKeyRef:
                  name: umami-secret
                  key: DIRECT_URL
          image: ghcr.io/zaherg/umami-postgres:latest
          name: umami
          livenessProbe:
            httpGet:
              path: /api/heartbeat
              port: 3000
            failureThreshold: 1
            initialDelaySeconds: 10
            periodSeconds: 10
          ports:
            - containerPort: 3000
              protocol: TCP
      restartPolicy: Always
Basically we create one instance of our project, that be updated one instance at a time when rolling a new update, and uses the docker image I mentioned above.
We should have all of the code in one big yam file called deploy.yml like so
---
apiVersion: v1
kind: Namespace
metadata:
  name: umami
---
apiVersion: v1
kind: Service
metadata:
  name: umami-service
  namespace: umami
spec:
  type: ClusterIP
  selector:
    app: umami
  ports:
    - port: 3000
---
apiVersion: traefik.io/v1alpha1
kind: IngressRoute
metadata:
  name: umami-ingress
  namespace: umami
spec:
  entryPoints:
    - web
  routes:
  - match: Host(`um.learn.zah.me`)
    kind: Rule
    services:
    - name: umami-service
      port: 3000
---
apiVersion: v1
kind: Secret
metadata:
  namespace: umami
  name: umami-secret
type: Opaque
stringData:
  APP_SECRET: Barnbrack53-notify62
  DATABASE_URL: postgresql://postgres.[your-username]:[yourpassword]@aws-0-eu-central-1.pooler.supabase.com:6543/postgres?pgbouncer=true
  DIRECT_URL: postgresql://postgres.[your-username]:[yourpassword]@aws-0-eu-central-1.pooler.supabase.com:5432/postgres
---
apiVersion: apps/v1
kind: Deployment
metadata:
  name: umami
  namespace: umami
  labels:
    app: umami
spec:
  replicas: 1
  strategy:
    type: RollingUpdate
    rollingUpdate:
      maxSurge: 1
      maxUnavailable: 0
  selector:
    matchLabels:
      app: umami
  template:
    metadata:
      labels:
        app: umami
        name: umami
    spec:
      containers:
        - env:
            - name: DATABASE_TYPE
              value: postgresql
            - name: APP_SECRET
              valueFrom:
                secretKeyRef:
                  name: umami-secret
                  key: APP_SECRET
            - name: DATABASE_URL
              valueFrom:
                secretKeyRef:
                  name: umami-secret
                  key: DATABASE_URL
            - name: DIRECT_URL
              valueFrom:
                secretKeyRef:
                  name: umami-secret
                  key: DIRECT_URL
          image: ghcr.io/zaherg/umami-postgres:latest
          name: umami
          livenessProbe:
            httpGet:
              path: /api/heartbeat
              port: 3000
            failureThreshold: 1
            initialDelaySeconds: 10
            periodSeconds: 10
          ports:
            - containerPort: 3000
              protocol: TCP
      restartPolicy: Always
Once you did that, you should run the following command
kubectl apply -f deploy.yml
And you will get an output like
➜ kubectl apply -f deploy.yml
namespace/umami created
service/umami-service created
ingressroute.traefik.io/umami-ingress created
secret/umami-secret created
deployment.apps/umami created
PS: you need to replace um.learn.zah.me with your own domain and make sure to update the DNS name in your DNS provider to add the IP address to the domain you will use.
Once you did that, you can visit your domain and you will be greated with the following images
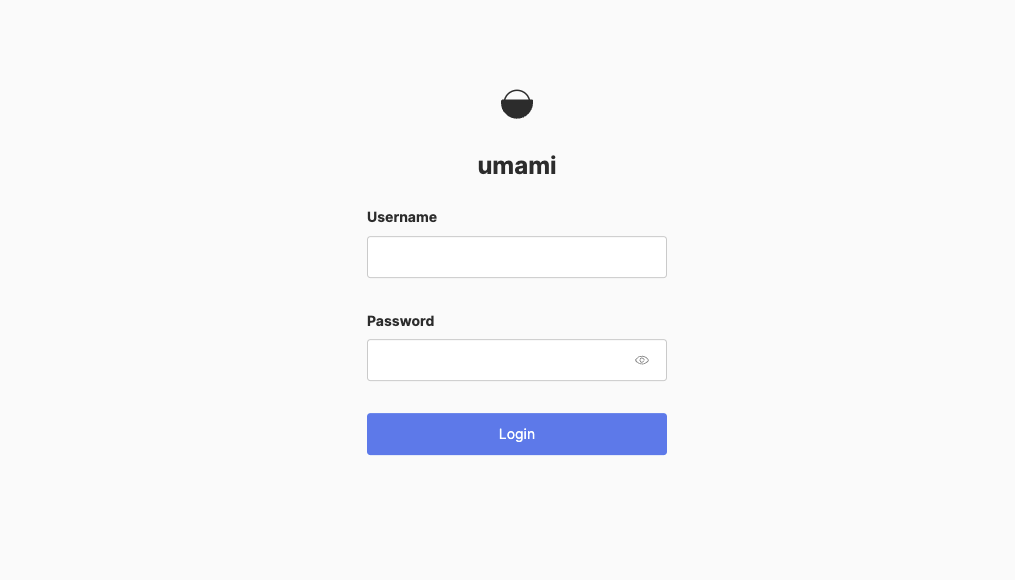
Your Umami installation will create a default administrator account with the username admin and the password umami.
Securing our Connection
Security is a big topic, that I won't be talking about, but what I mean by securing is that we use https instead of http to access our site, and this is where cert-manager comes in hand.
Just to be clear, I'll be using cloudflare as it is my DNS provider, but you can check cert-manager website to see a list of the supported providers.
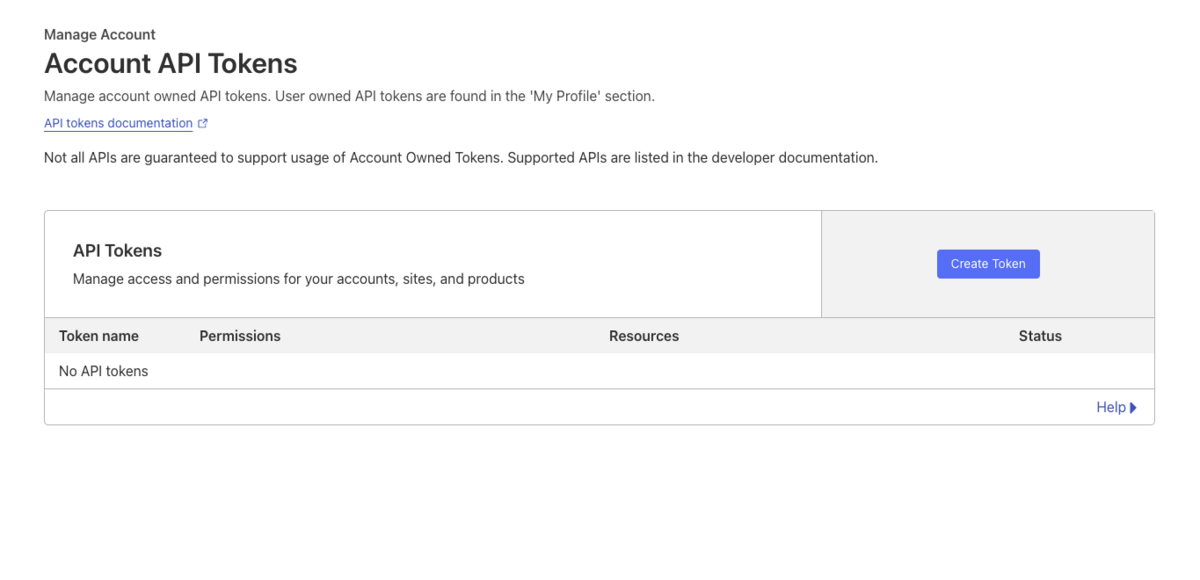
Obtain your Cloudflare API Token
From manage account, go to Account API Tokens and create a token
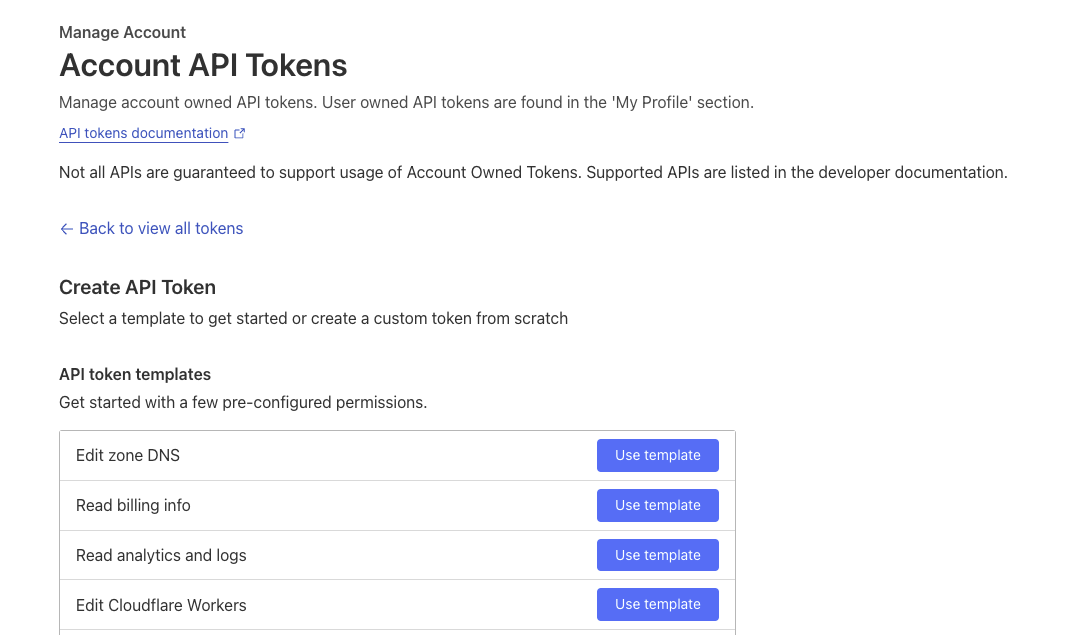
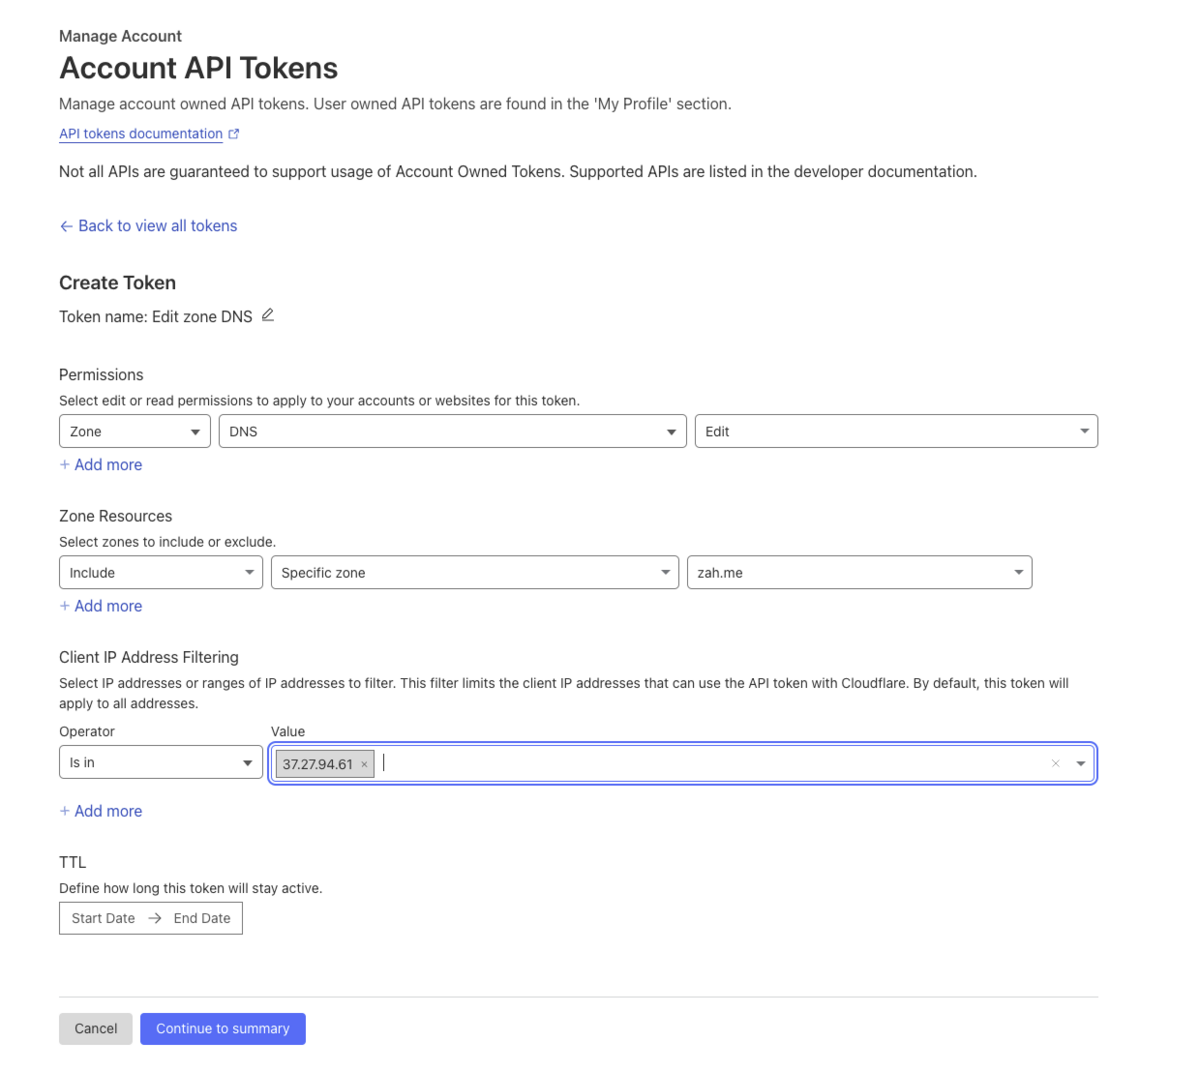
Choose the edit zone DNS
and create one for your selected zone, for me it will be zah.me and you can specify the IP address of your server for more security measure
Once you created the token, you need to convert it to base64 something like the following command
➜ echo -n "V4z1sVDj9gPrdraRS2JxzmFumjZcUo-H8pySU0Xd" | base64
VjR6MXNWRGo5Z1ByZHJhUlMySnh6bUZ1bWpaY1VvLUg4cHlTVTBYZA==
We copy the value and use it to create a secret resource
---
apiVersion: v1
kind: Secret
metadata:
  name: cloudflare-api-token-secret
  namespace: cert-manager
type: Opaque
data:
  api-token: VjR6MXNWRGo5Z1ByZHJhUlMySnh6bUZ1bWpaY1VvLUg4cHlTVTBYZA==
Creating a ClusterIssuer
There are two way to request a certificate, either by the help of an Issuer or via ClusterIssuer, they are the same, the only difference is that ClusterIssuer is not bind to any namesapce
---
apiVersion: cert-manager.io/v1
kind: ClusterIssuer
metadata:
  name: cloudflare
spec:
  acme:
    email: zaher@zaher.dev
    server: https://acme-v02.api.letsencrypt.org/directory
    privateKeySecretRef:
      name: cloudflare-account-key
    solvers:
      - dns01:
          cloudflare:
            apiTokenSecretRef:
              name: cloudflare-api-token-secret
              key: api-token
Create the Certificate (or requesting one)
The last step we need to do is to request a certificate for our domain, now I like to create a wildcard one so I don't need to request one for each service I create later, unless I changed the domain, then I need to create a clusterissuer and a new certificate
The yaml content for it is simple
---
apiVersion: cert-manager.io/v1
kind: Certificate
metadata:
  name: my-sertificate
  namespace: umami
spec:
  secretName: my-sertificate
  issuerRef:
    name: cloudflare
    kind: ClusterIssuer
  commonName: "*.learn.zah.me"
  dnsNames:
    - "*.learn.zah.me"
    - "learn.zah.me"
Now that everything is ready we need to apply them, as with all the other commands, we have them all in one big yaml file and then we use kubectl to apply it
---
apiVersion: v1
kind: Secret
metadata:
  name: cloudflare-api-token-secret
  namespace: cert-manager
type: Opaque
data:
  api-token: VjR6MXNWRGo5Z1ByZHJhUlMySnh6bUZ1bWpaY1VvLUg4cHlTVTBYZA==
---
apiVersion: cert-manager.io/v1
kind: ClusterIssuer
metadata:
  name: cloudflare
spec:
  acme:
    email: zaher@zaher.dev
    server: https://acme-v02.api.letsencrypt.org/directory
    privateKeySecretRef:
      name: cloudflare-account-key
    solvers:
      - dns01:
          cloudflare:
            apiTokenSecretRef:
              name: cloudflare-api-token-secret
              key: api-token
---
apiVersion: cert-manager.io/v1
kind: Certificate
metadata:
  name: my-sertificate
  namespace: umami
spec:
  secretName: my-sertificate
  issuerRef:
    name: cloudflare
    kind: ClusterIssuer
  commonName: "*.learn.zah.me"
  dnsNames:
    - "*.learn.zah.me"
    - "learn.zah.me"
and the command is
➜ kubectl apply -f hetzner-learn.yml
secret/cloudflare-api-token-secret created
clusterissuer.cert-manager.io/cloudflare created
certificate.cert-manager.io/my-sertificate created
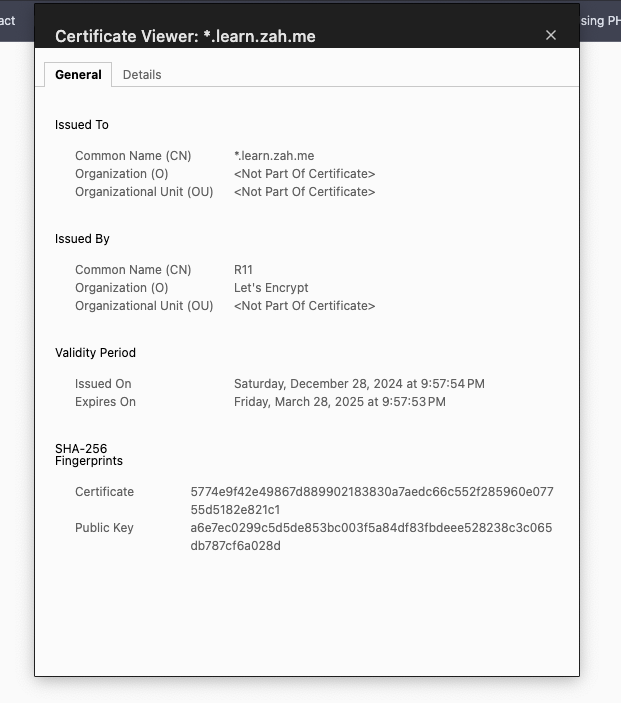
Once we done that, we need to wait for a few minutes untill the certificate is issued.
If you are like me and want to check for the ceritficate request status, you can run the following command
kubectl describe certificaterequest
and once you got the following, mainly the status value is true, you are ready to our next step
Conditions:
    Last Transition Time:  2024-12-28T18:34:07Z
    Message:               Certificate request has been approved by cert-manager.io
    Reason:                cert-manager.io
    Status:                True
    Type:                  Approved
    Last Transition Time:  2024-12-28T18:37:01Z
    Message:               Certificate fetched from issuer successfully
    Reason:                Issued
    Status:                True
    Type:                  Ready
Update the IngressRoute
Once your certificate is done, you needs to update your IngressRoute to use some of the Traefik middlewares and use the secure connection instead of the insecure one.
First lets create the middlewares
---
# Enable compression https://doc.traefik.io/traefik/middlewares/http/compress/
apiVersion: traefik.io/v1alpha1
kind: Middleware
metadata:
  name: compress
  namespace: umami
spec:
  compress:
    defaultEncoding: zstd
    includedContentTypes:
      - application/json
      - text/html
      - text/plain
---
# Here, an average of 10 requests per min is allowed.
# In addition, a burst of 200 requests is allowed.
# burst is the maximum number of requests allowed to go through in the same arbitrarily small period of time.
apiVersion: traefik.io/v1alpha1
kind: Middleware
metadata:
  name: ratelimit
  namespace: umami
spec:
  rateLimit:
    period: 1m
    average: 10
    burst: 60
---
# Redirect to https
apiVersion: traefik.io/v1alpha1
kind: Middleware
metadata:
  name: redirectscheme
  namespace: umami
spec:
  redirectScheme:
    scheme: https
    permanent: true
we need to apply those middleware to create them using kubectl
kubectl apply -f middlewares.yml
Lastly we update the IngressRoute like the following
---
apiVersion: traefik.io/v1alpha1
kind: IngressRoute
metadata:
  name: umami-ingress
  namespace: umami
  annotations:
    cert-manager.io/cluster-issuer: cloudflare
    cert-manager.io/common-name: "um.learn.zah.me"
spec:
  entryPoints:
    - web
    - websecure
  routes:
  - match: Host(`um.learn.zah.me`)
    kind: Rule
    services:
    - name: umami-service
      port: 3000
    middlewares:
    - name: compress
    - name: redirectscheme
    - name: ratelimit
  tls:
    secretName: my-sertificate
once you update it, run kubectl apply -f deploy.yml and you are done, visiting your domain (in my case um.learn.zah.me) will redirect me to https instead of http and we can see that our SSL is value